INTRO
This topic is going to be some kind of cheat sheet or cookbook for some obvious things and some very specific knowledges about work-flow in Fusion 360. But do not forget that I'm also learning with you and this topic in the same time is my scrapbook with notes, so I'm glad if this observations helped you, but if it's not - sorry, because it's so much to learn for me as well.
There are a lot off CAD programs on the market, but most common cost hell lot of a money and open-source looks like a glitchy compromises to each-other. So after some research I choose for myself Fusion 360 as a main CAD tool. It's open for enthusiasts and people who makes their first steps. As I understand Autodesk are really interested to grow big community over this product and they want if to be consisted of not only experienced professionals but also young blood to gather feedback from both of them and make this program better from day to day. Yes, I really hate all this obsession over cloud solutions and how companies with their countless variations of cloud workspaces trying to push them like only one blessed. But if get use to this Fusion 360 is extremely flexible and very fast-growing tool with lot's of functionality and possibilities.
Pay attention. It's very important. Because Fusion 360 full of nameless abstractions, I decide to use prefixes before some item names to make more clear to what section they belong.
ENVIRONMENT
So you are launching Fusion 360 very first time. First things first is your environment. Here is some tips to make it more comfortable to use.
Units setup
We are not masochists, are we? So let's just use metric unit system.
Click on your account name in the top right corner of the window.
Select "Preference" from the dropdown.
Expand "Default Units" section and select "Design" sub-category from it.
Select "mm" in "Default units for new design" dropdown.
Switch to "Manufacture" sub-category.
Select "mm" in "Default units" dropdown.
Switch to "Simulation and Generative Design" sub-category.
Select "Metric (SI)" in the very top "Default units for new Simulations and Generative Designs" dropdown.
Selecting feature
Yes, this is about how to select something in Fusion 360. I know, I know... But even behind such a regular operation we have really cool and intuitive solution.
When you drag a selection field from left to right, you selecting only the s.e.parts that completely covered with this selection field.
When you drag a selection field from right to left, you selecting all the s.e.parts that this selection field even barely touched.
BASICS
Logical hierarchy
Like almost all processes this one has it's logical hierarchy of things. To understand how complex system works it's better to split this system in to logical parts.For me basic logical chain in Fusion 360 looks like this in order from basic to global.
Plane -> Sketch -> Features -> Body -> Element -> Construction
Plane is the surface on what you are making sketch projection.
Sketch is the drawing that determine contour to which you are applying features.
Features are using to transform sketch contour into body shape. Also with features we can modify bodies and predetermine relationships between them.
Body is the 3D objects that correspond with each other to form element.
Element is the combination of few bodies and features applied to them.
Construction is the final assembly of elements with all alignments and mechanical joints.
Yes, for sure I know that every of this element contains lot's of stuff inside, but for now I'm just talking in abstract way.
Sketch elements
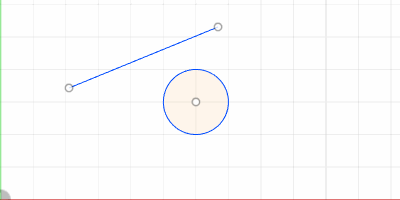
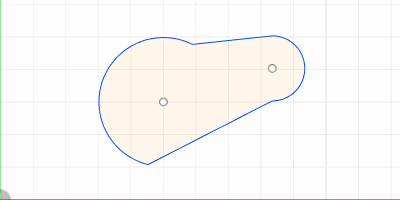
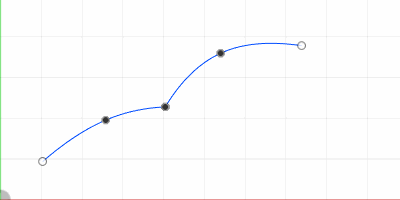
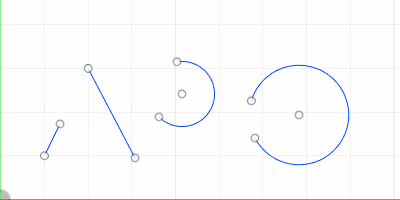
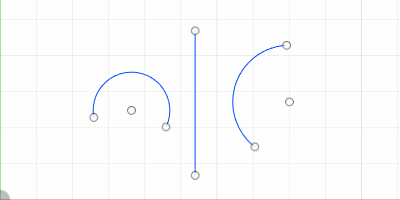
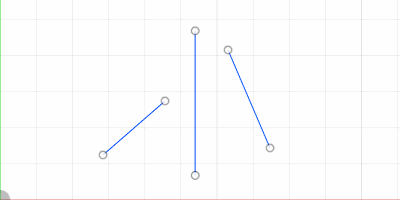
Sketch section in Fusion 360 filled with lot's of pre-built stuff. Let's call them "s.elements" (sketch elements). By understanding their nature you can recreate all of them with just three most basic s.elements: s.point, s.line, s.arc.
Triangle, square... any of polygons assembled from s.point and s.line s.elements. Any curve can be decomposed in to s.arc and s.line s.elements and the difference is only in complexity of this combination. Circle is just a self-closed s.arc s.element where starting and ending s.e.points have the same coordinates. Clear enough, yeah? Yes, sure, for complex curves most probably you are going to use curve object, but for now consider this as another way to simplify process for more clear explanation.
S.point, s.line and s.arc are completed by themselves and they can't be broken apart like polygons, for example. But in the same time s.line and s.arc s.elements consist of inseparable logical parts. Let's call them "s.e.parts" (sketch element parts) from now on - s.e.point and s.e.body. Here is how it looks like.
s.e.points

s.e.bodys

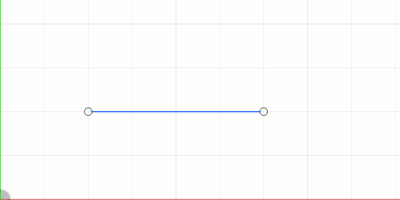
S.point is just a s.e.point... only one s.e.part - simple as that.
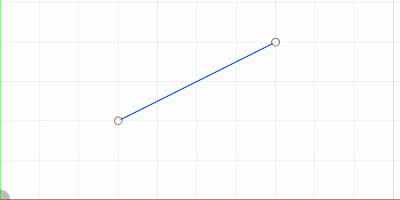
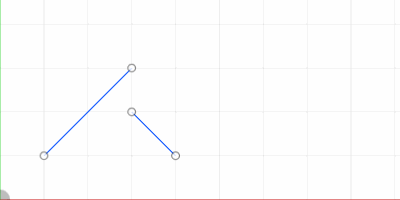
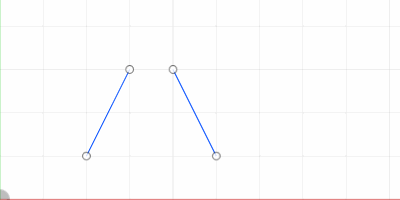
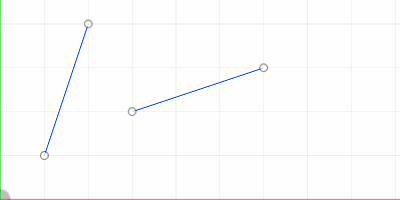
S.line consist of starting s.e.point, ending s.e.point and s.e.body passing through them.
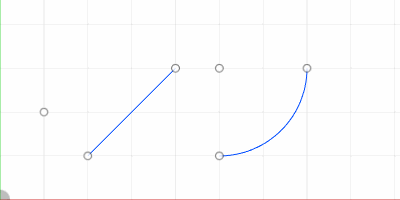
S.arc no matter which way you build it consist of starting s.e.point, ending s.e.point, center s.e.point and s.e.body.
Interesting to know that in GUI interface you can't recognize differences between starting and ending s.e.points. And to be honest it's not needed here. And where it's needed... it's complete another story.
Constraints
Sketch is not just a drawing. Perceive each s.element that described in previous section as separate instances that binded and collaborating with each other by rules. In Fusion 360 this rules called constraints. It's important to mention that you are applying constraints not to s.elements itself but to their s.e.parts. And here I will explain purpose of each constraint type.
Coincident - This constraint is binding s.e.parts of s.elements.

Collinear - Forces s.line to be on the same line and point to the same direction to another s.line.
Concentric - Makes s.elements center s.e.point positions even.

To be honest I usually using coincident instead of this. The difference that for concentric you are operating with s.e.bodies of s.elements and for coincident you operating with center s.e.points of s.elements.
Midpoint - Binding s.e.part to abstract middle point on s.line s.e.body.

Fix/UnFix - This constraint is fixing position of s.elements s.e.part on the sketch plane. This is a good example to show that constraints applying not to the whole s.element, but to s.e.parts of this s.element.

Parallel - Makes s.lines parallel.
Perpendicular - Makes s.lines perpendicular.

Horizontal/Vertical - Aligns the s.line vertically or horizontally depending on the position to which it's close.
Tangent - Directs s.line to be in contact with s.arc or any curve s.element at only one point. I'm mostly using it to make smooth transition from s.arc to s.line.
Curvature - It smoothes connection point of two different connected s.curves to make them looks harmoniously like a single s.element.
Equal - Makes values of s.elements like length of the s.line or diameter of s.circle equal.
Symmetry - Makes two simmilar s.e.parts of different s.elements symmetrical against axis of symmetry. It's applicable for both s.e.points and s.e.bodys. The axis of symmetry can be any s.e.body of s.line.
EPILOGUE
And for today that's all. As you can see I'm not creating various posts for the simmilar topics and just continue old one with updates. And for this one I have a lot to say, so keep coming.
Created by TennojiM
All rights reserved
© 2026
All rights reserved
© 2026